
Something doesn’t work as expected? Please, try the following:
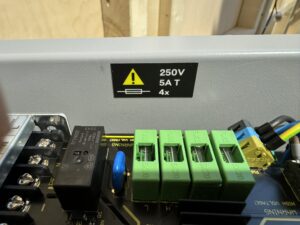
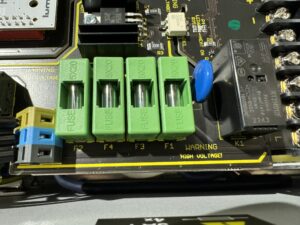
FUSE INFO: there are replaceable fuses inside LM3X projectors; the LAZR 4G™ model contains four fuses 250V; 5A T type, marked F1 – F4.
F1 -> Main Phase Conductor; if it fails, the projector won’t start
F2 -> Main Neutral Conductor; if it fails, the projector won’t start
F3 -> Heating Circuit Phase Conductor; if fails, the projector will work, but heating won’t work
F4 -> Heating Circuit Neutral Conductor; if fails, the projector will work, but heating won’t work
For other models fuse information, contact support@LM3X.com